CityBase
While at CityBase I built two products from the ground up, built a new brand for CityBase and managed all designs that went out into the world.
Revenue Management
Revenue Management is a research tool that allows government employees to understand where all the money coming into their city is coming from. Oftentimes money can be coming from all sorts of different places from in-person cash payments to online credit card payments. Revenue Management takes all of those disparate sources and compiles them into one easy to use product.
How Did We Get Here?
When I started at CityBase we had a few different payment products including online payments, point of sale payments, and kiosk payments. We didn’t have a really good way to give our clients insight into payments from all of those products. If we truly wanted to be an integrated platform we needed a place where our clients could see all of those payments.
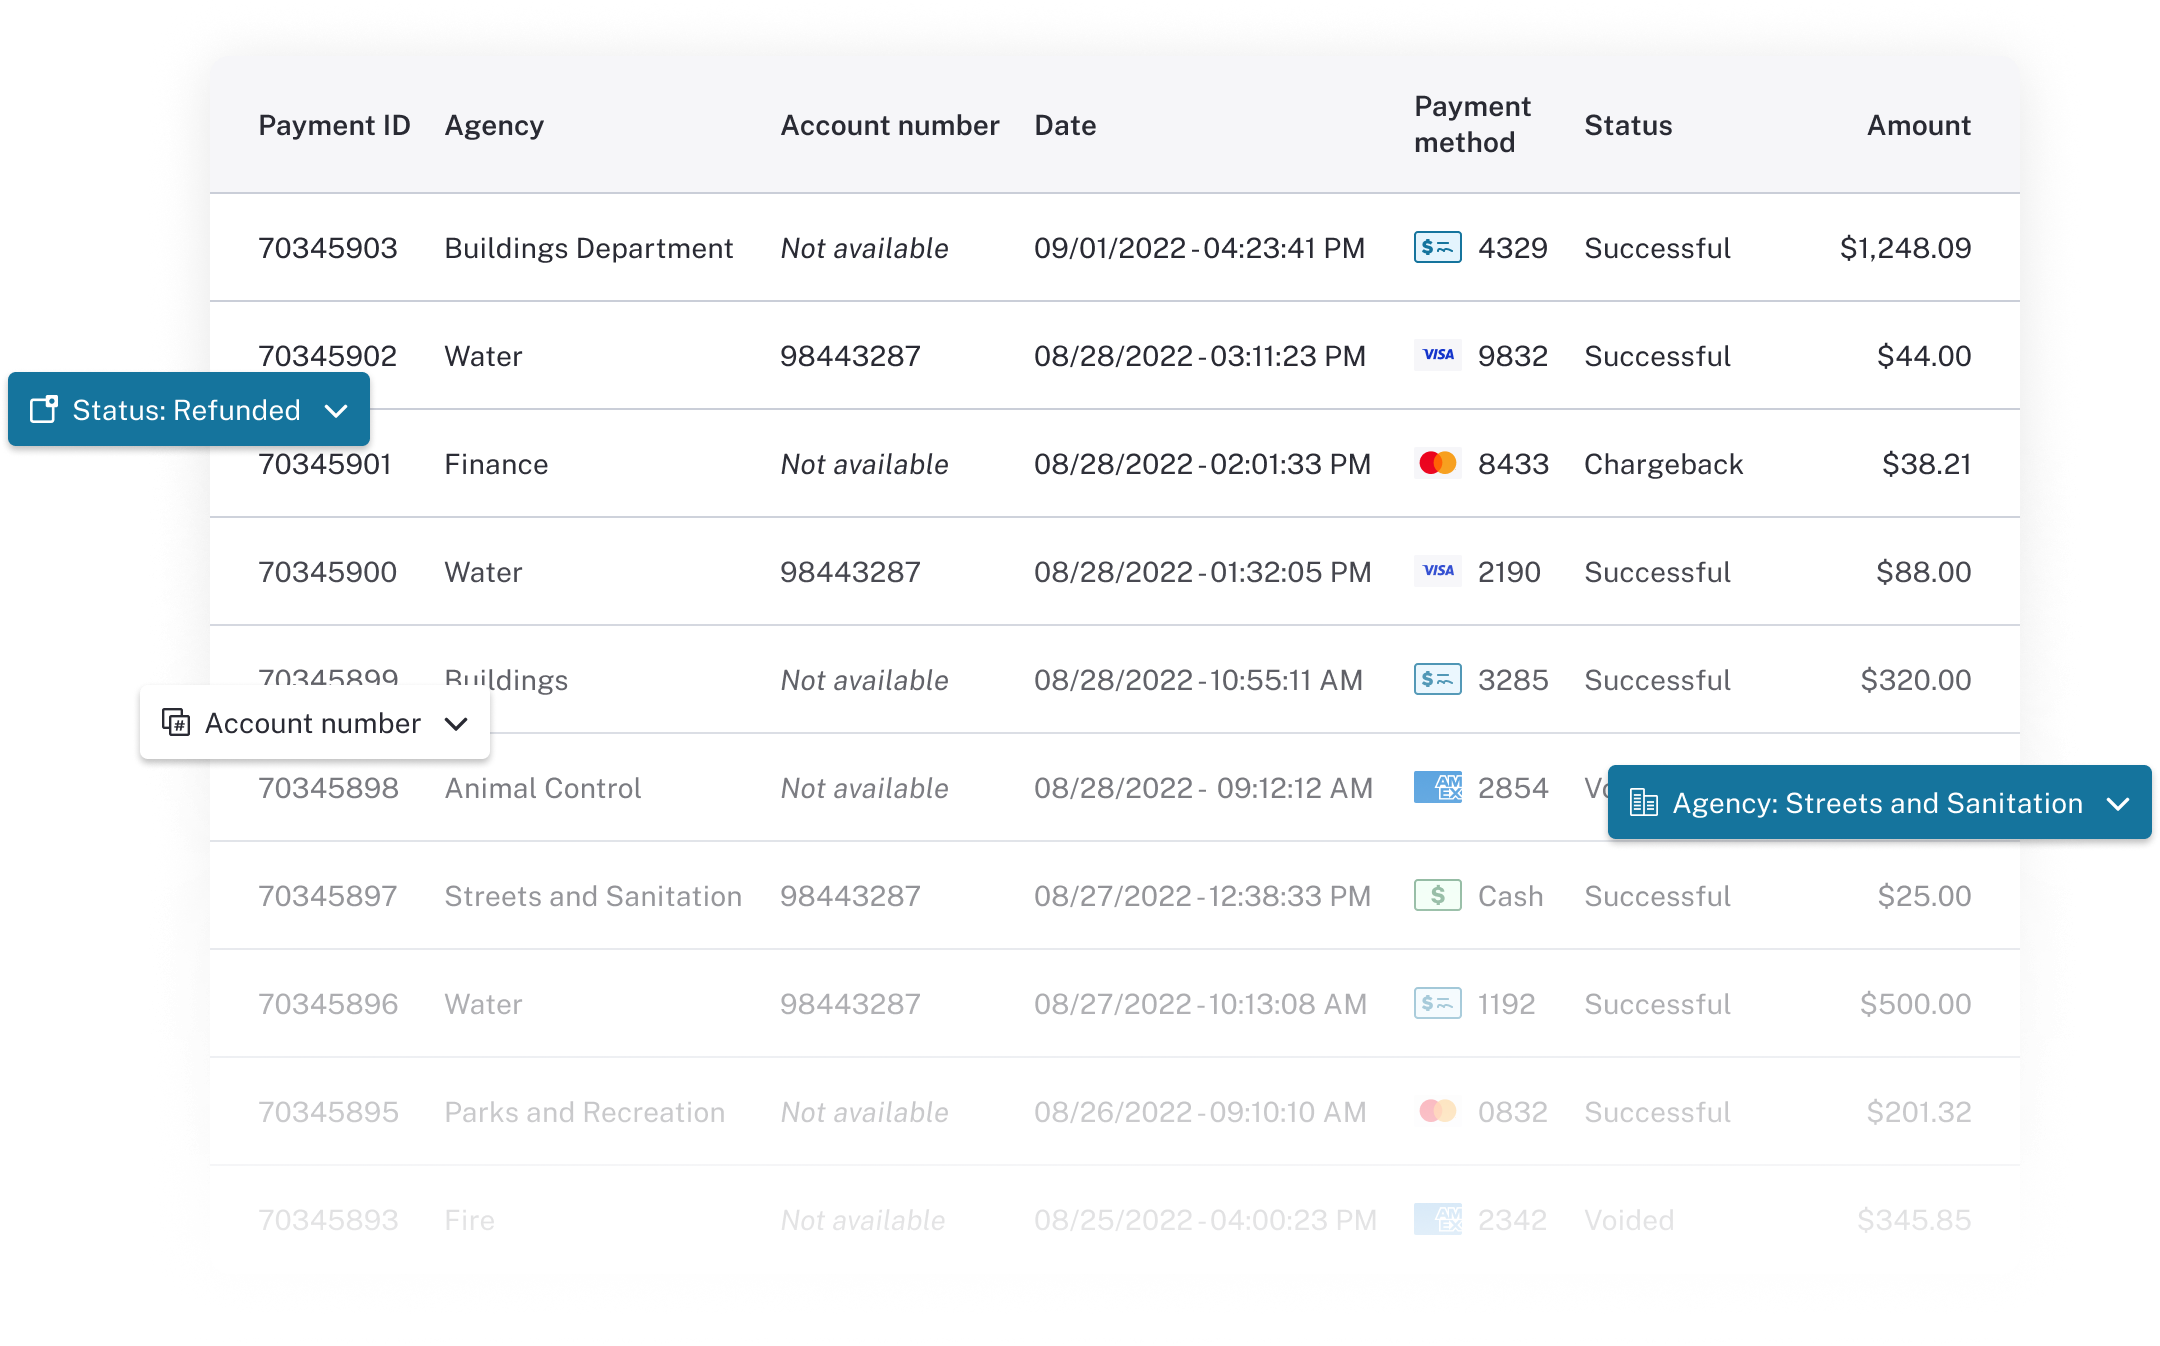
Revenue Management: Search Results and Filters
Where to Start?
We had a vague idea of what we wanted to do, but we needed to validate all of our assumptions. Our first step was to do some competitive research. We spent time looking at what we could around the industry, but GovTech companies are very secretive about their products. So we spent most of our time looking at e-commerce revenue management products like Stripe and Square. They didn’t always have to deal with the unique and complex payment structures that governments did, but it was a good starting point.
Ask The Experts
After doing a competitive audit we then went to the experts, our clients. They would be the ones using the product every day, so we needed to find out how they used their current solution. We asked them what they loved, what they didn’t, and what they wished they always had in a revenue management tool. By looking at the space around us and directly to our clients we were able to validate a lot of our assumptions and reprioritize features.
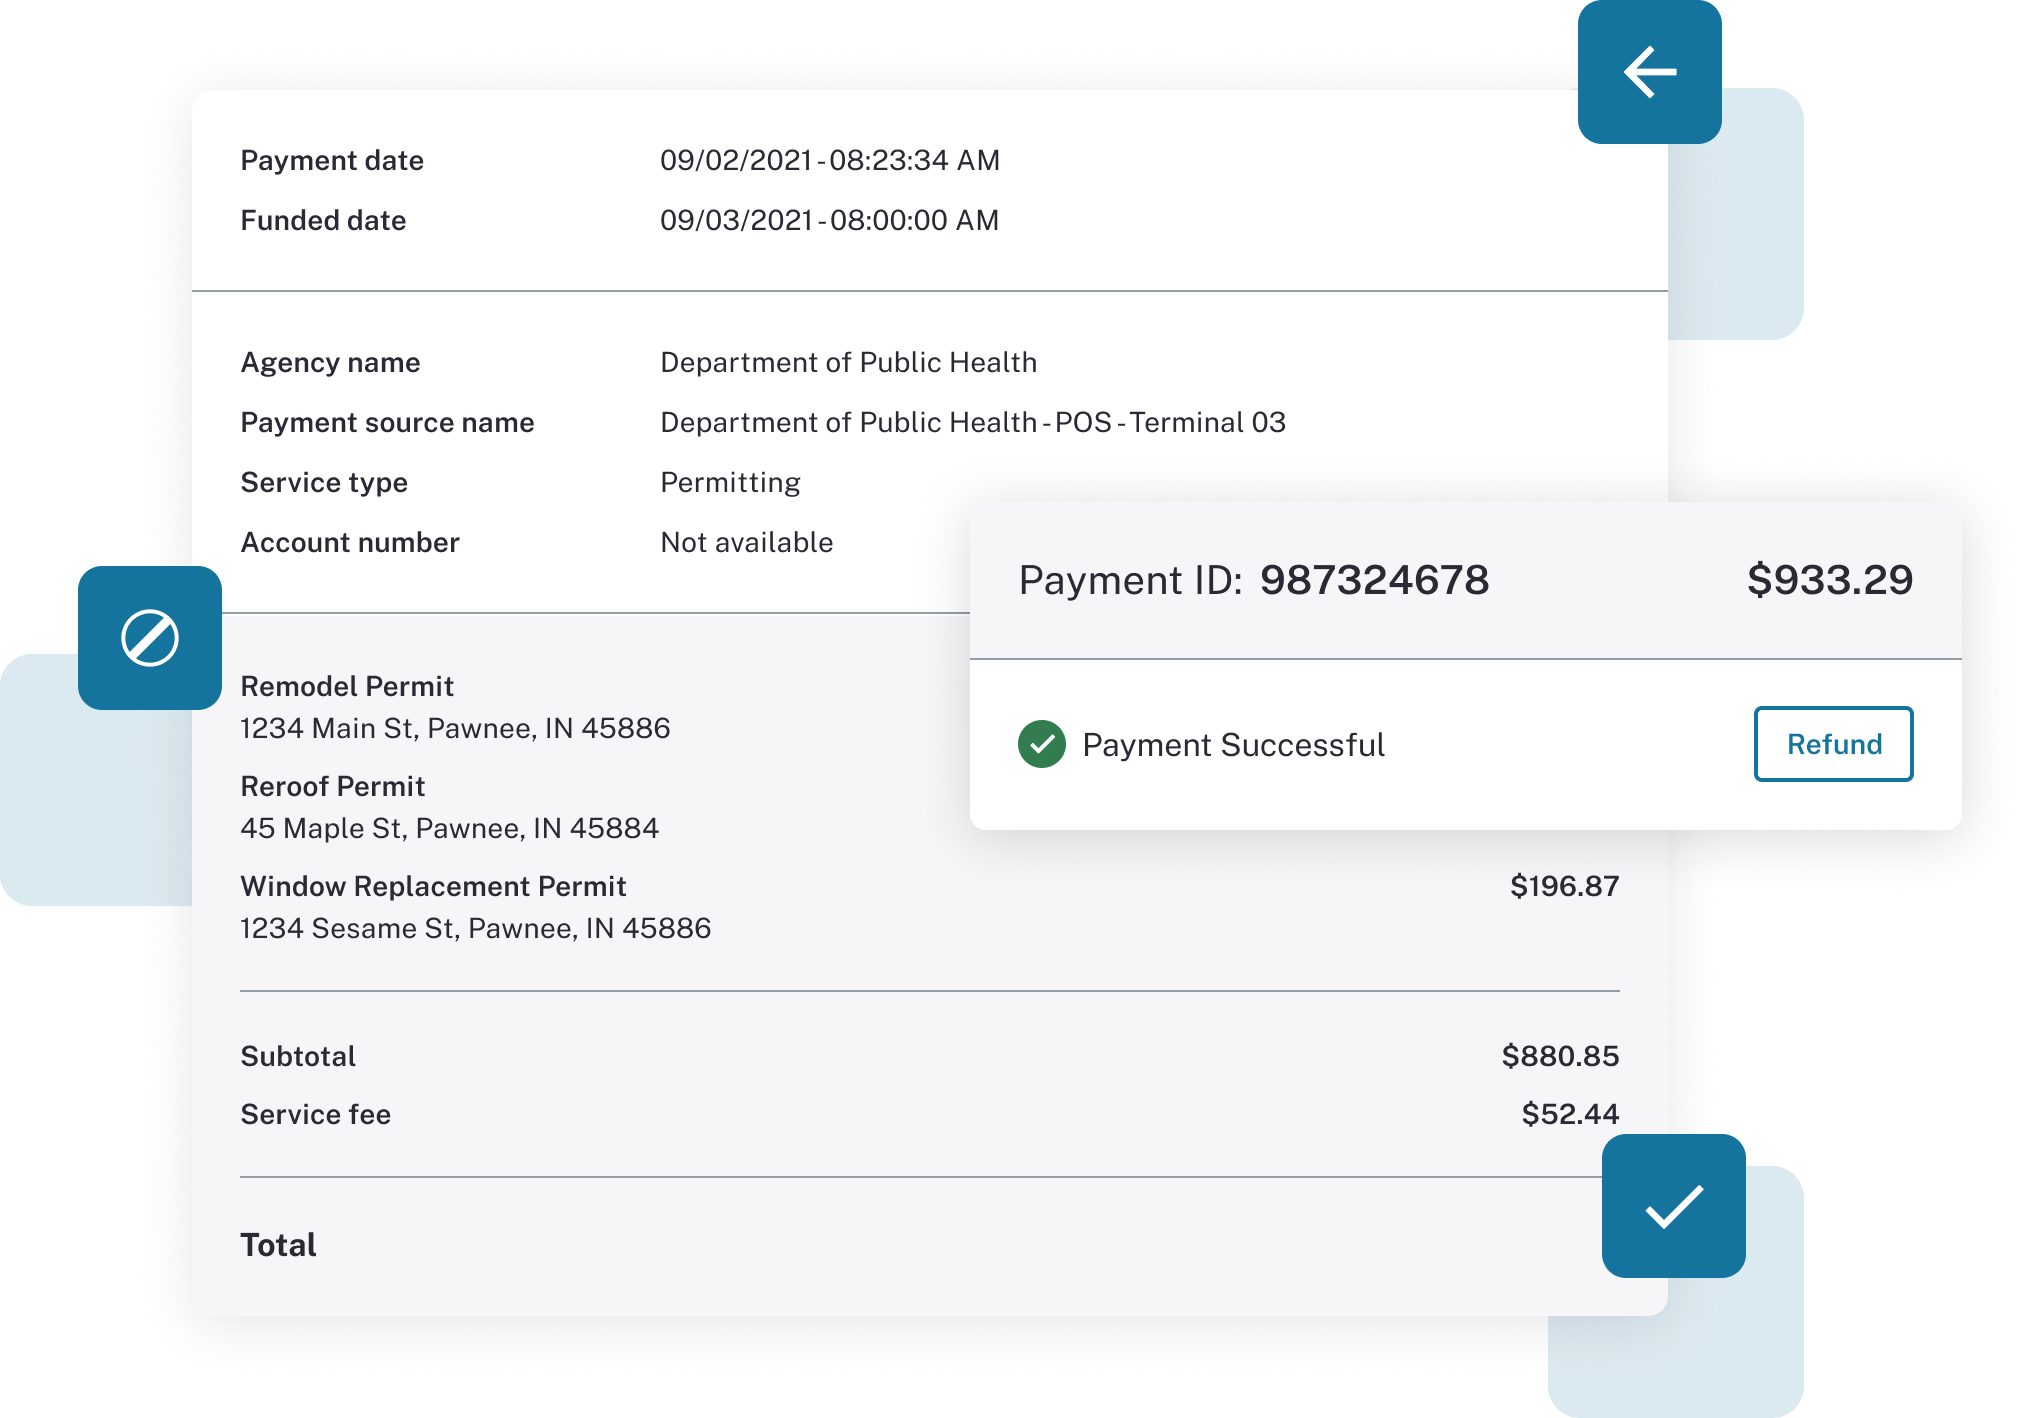
Revenue Management: Transaction Details Modules
A Design to That Makes Complex Research Easy
With all of this research in hand I spent the next chunk of time going page by page building out what we thought this new product should be. There were only a few main pages that we needed, but within each there was a lot of complexity. The most important page was the payment search page. If you couldn’t find the payments you needed, then the product was mostly useless. I spent a lot of time focused on how we could make almost a dozen filters and potentially hundreds of thousands results easy to parse.
To understand what filters were most useful we spent time interviewing our clients. We realized while all of the filters were useful in certain scenarios, only a few were going to be used constantly. The most important one was the Transaction ID. Every payment has one, so you could quickly find any payment if you just knew that number. We made that our main search criteria above everything else in a search bar. The rest of the search criteria were put in below as filters in the order of most to least commonly used.
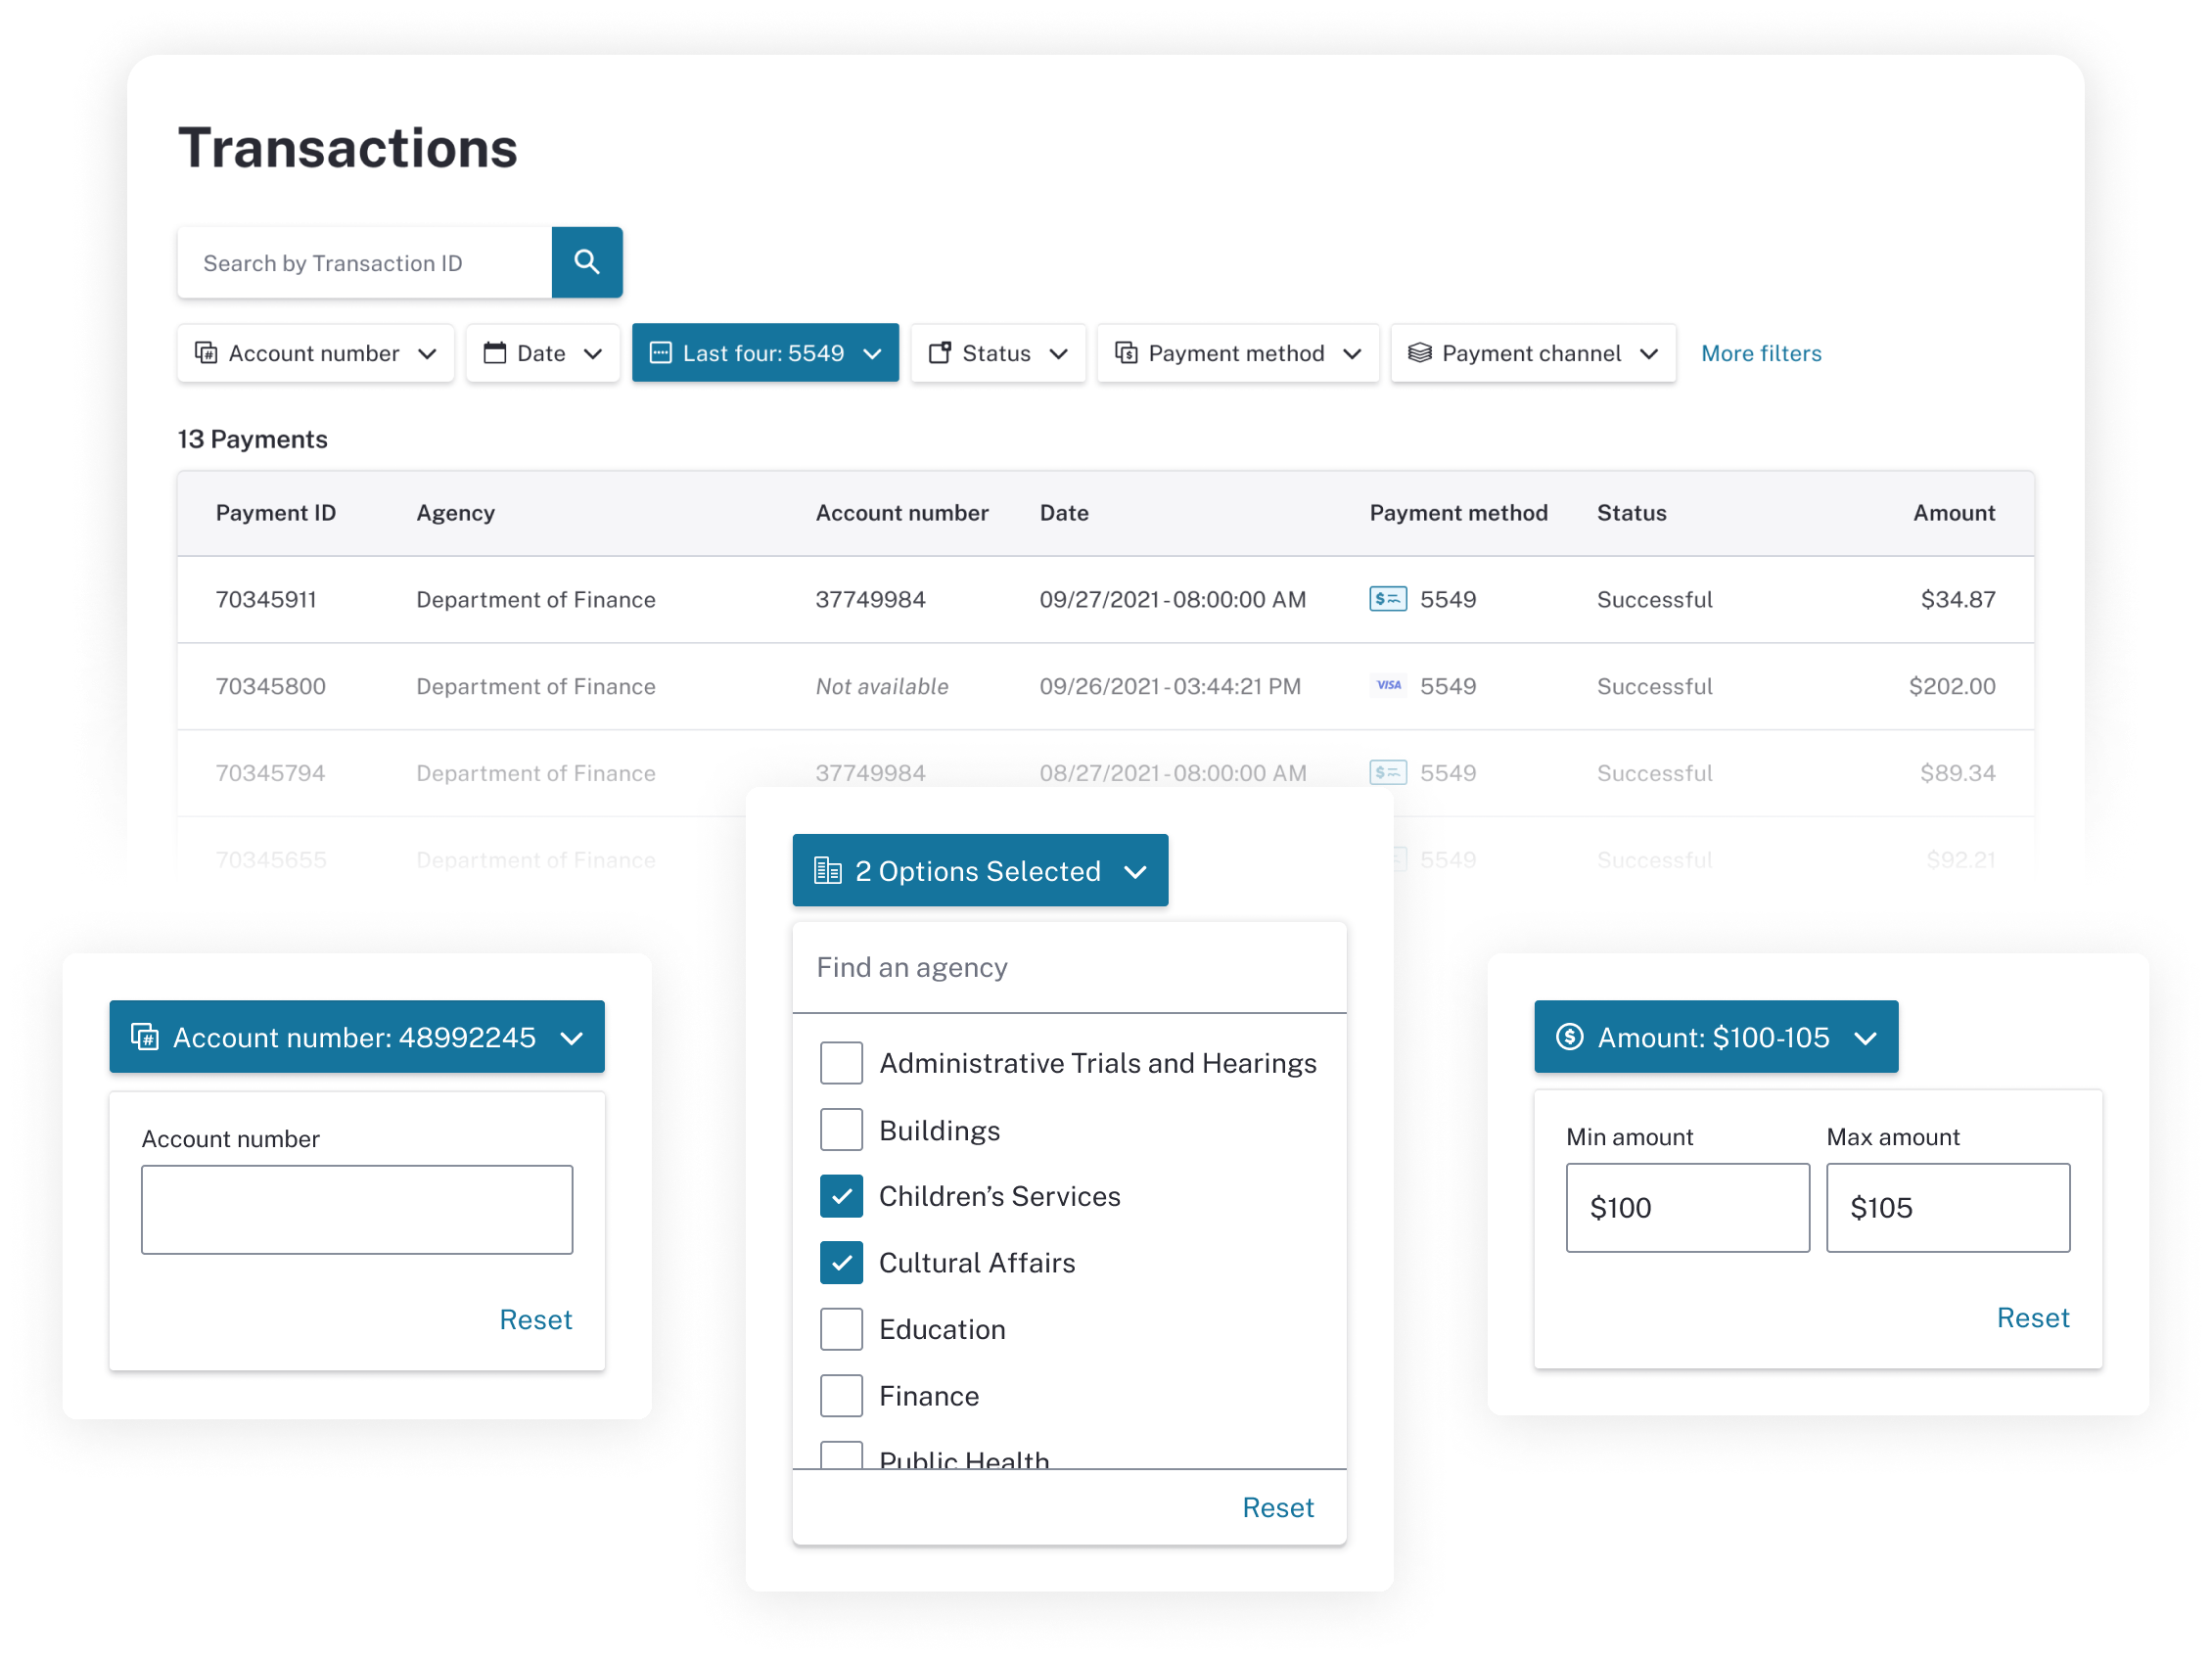
Transaction Search and Filters
Acting on Payments
After the payment search page the rest of the product was mostly organizing data, or other search pages that mimicked payments. The payment details page was the next most frequently used page. This is where you would come to see all the individual details for a payment like where it was paid, who made the payment, what payment method they used, and more. By clicking on a specific payment within the search results you could unlock all of this data that was previously spread out over multiple tables in the previous solution.
On top of the data on the page you can interact with these payments by voiding or refunding them. This is probably the next most important feature beyond the search. If something goes wrong with a payment, voiding it and refunding are most often the solution. We originally released a pretty simple one click void and refund feature, but as we onboarded more clients we realized we needed a more complex refund system. We realized that other clients needed to refund parts of a payment, but not the whole thing. With that knowledge we created three variations of refunds that we could roll out depending on the client’s needs. A whole and simple refund, like we had since the product launched, a partial refund for whole line items in an order, and a partial refund where each line item could be partially refunded.
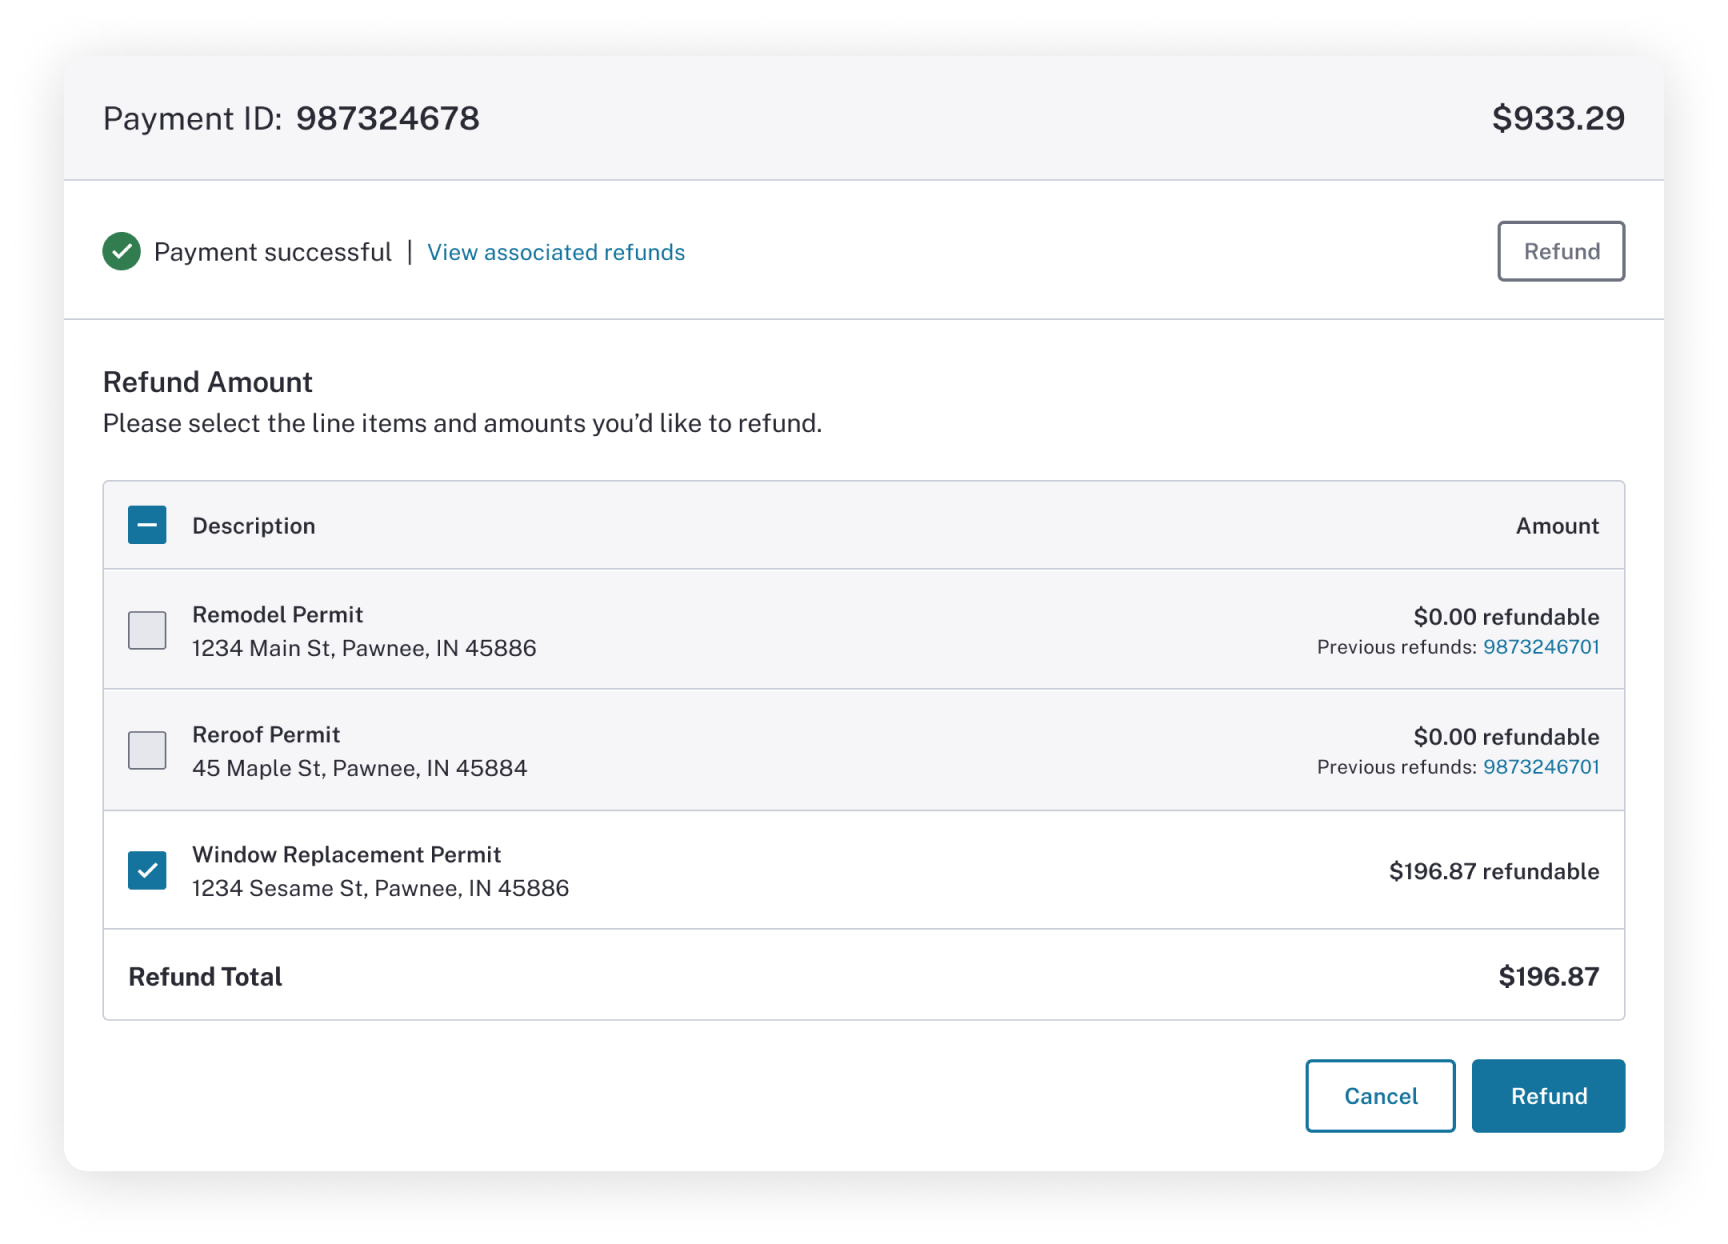
Whole Amount Line Item Refund
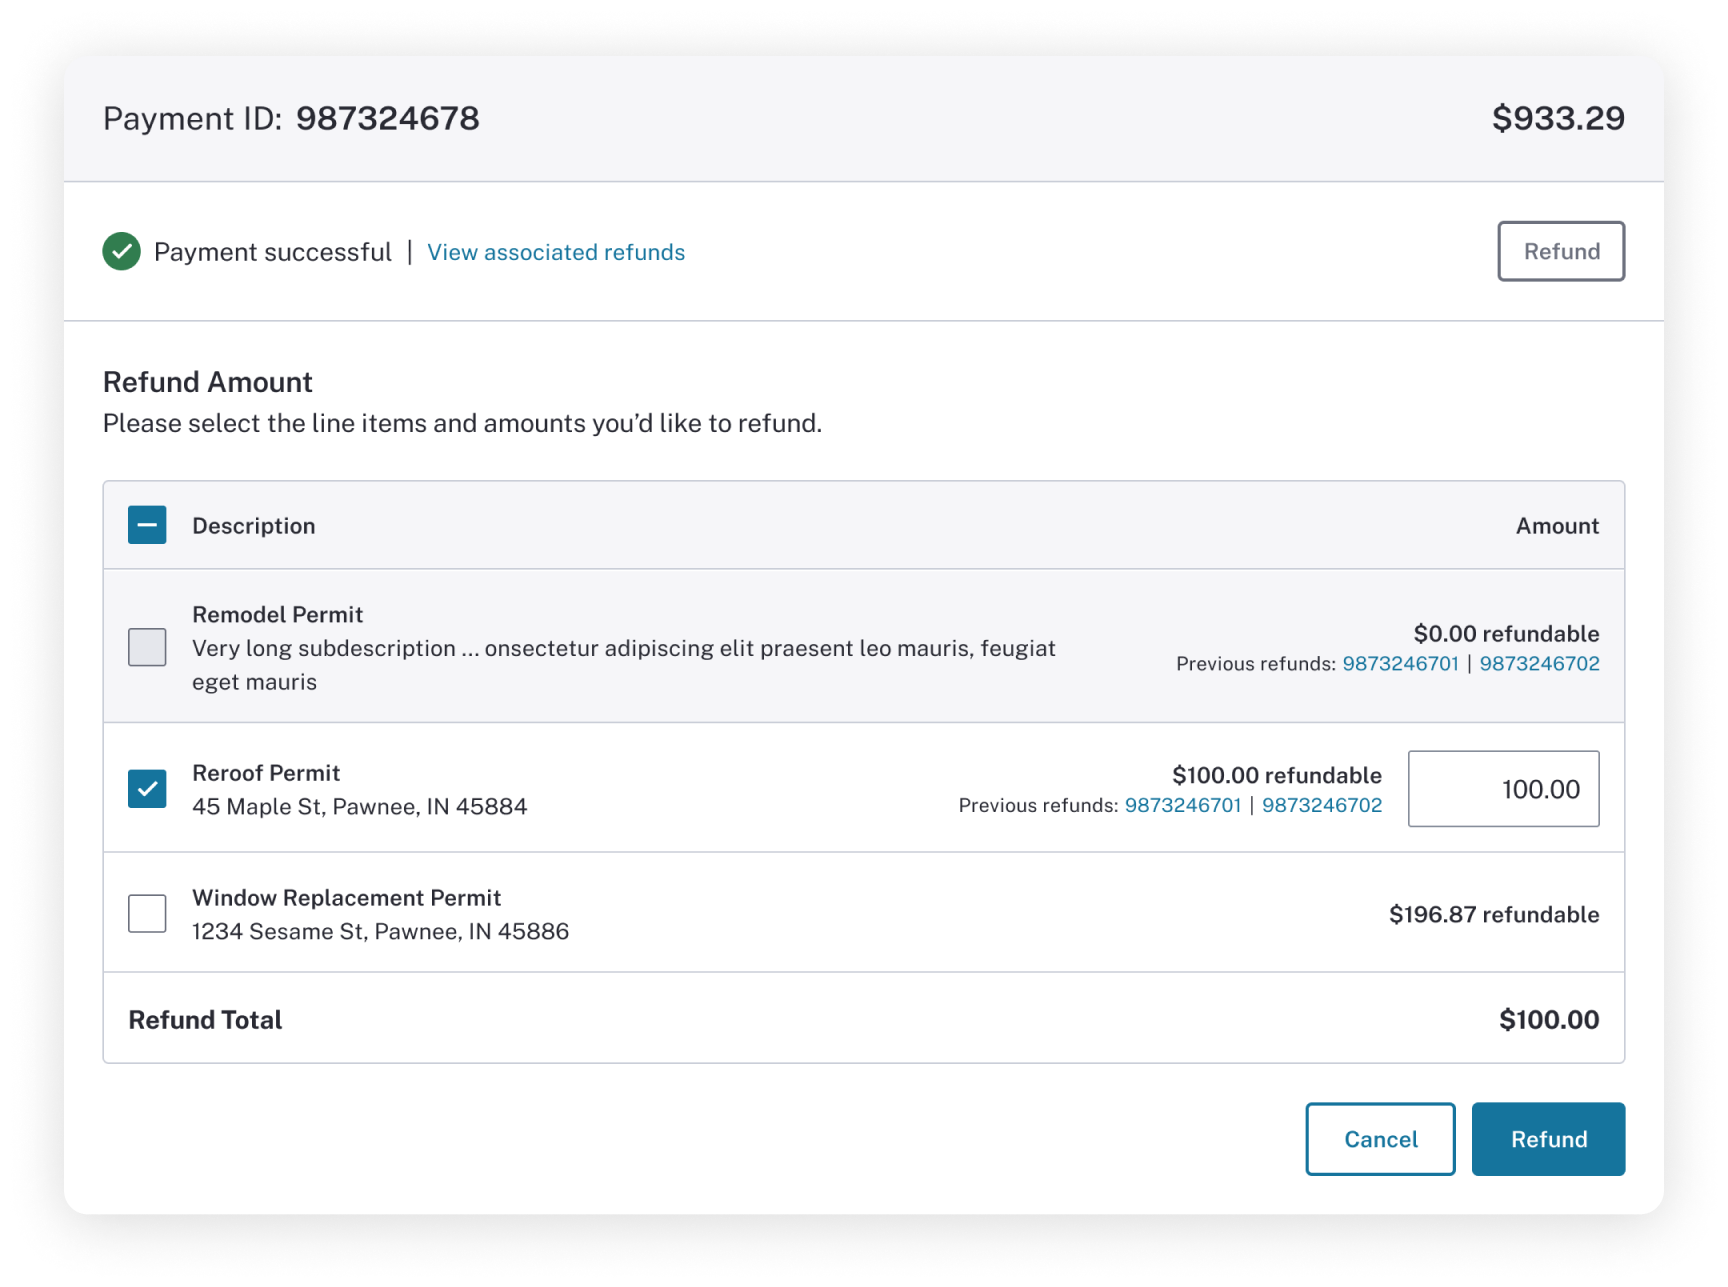
Partial Amount Line Item Refund
Managing Users
Much like the refunds described above when we launched Revenue Management we just launched a simple users page. The page when launched contained a simple unpaginated table of users ordered by their last name. This was fine for most of our initial clients who had at most 30 or so users. However, when we started onboarding bigger clients with hundreds of users we began to get feedback that managing users was an unpleasant task. We set up research meetings with some of these larger clients to understand their pain points. What we heard was that administrators wanted to be able to see groups of users. For example, an admin of the finance department might want to see all of the active users for that department. This led us to designing the experience to include filters that mimicked our payments page.
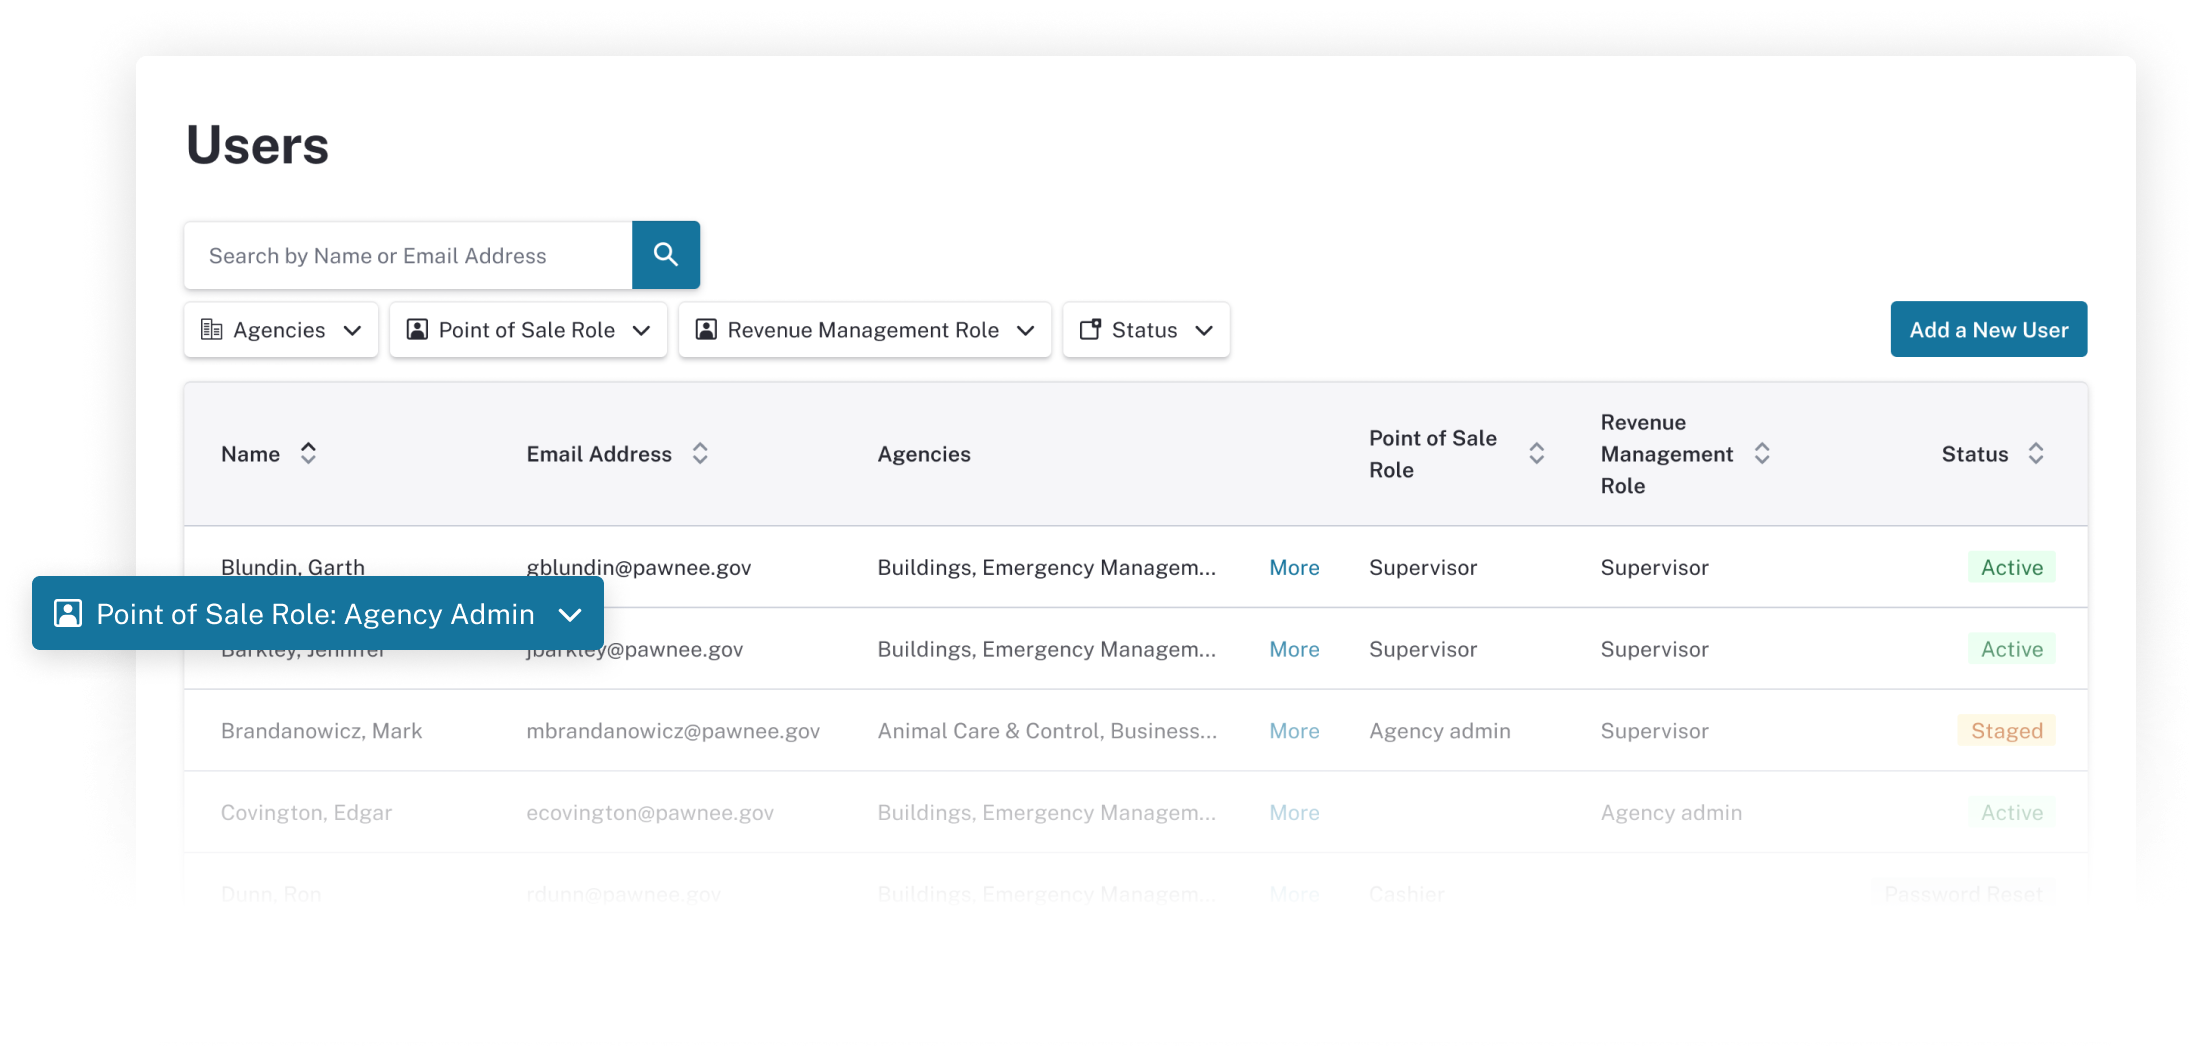
Users Table